Managing the Destination Directory
Dashboard / Directory
For many Carat Admins, the Directory will be the most labor intensive feature to setup for their Carat event. The Destination Dashboard exists to make this as easy and seamless as possible for Admins, and through this guide, we'll teach you what options are available to you within the Directory.
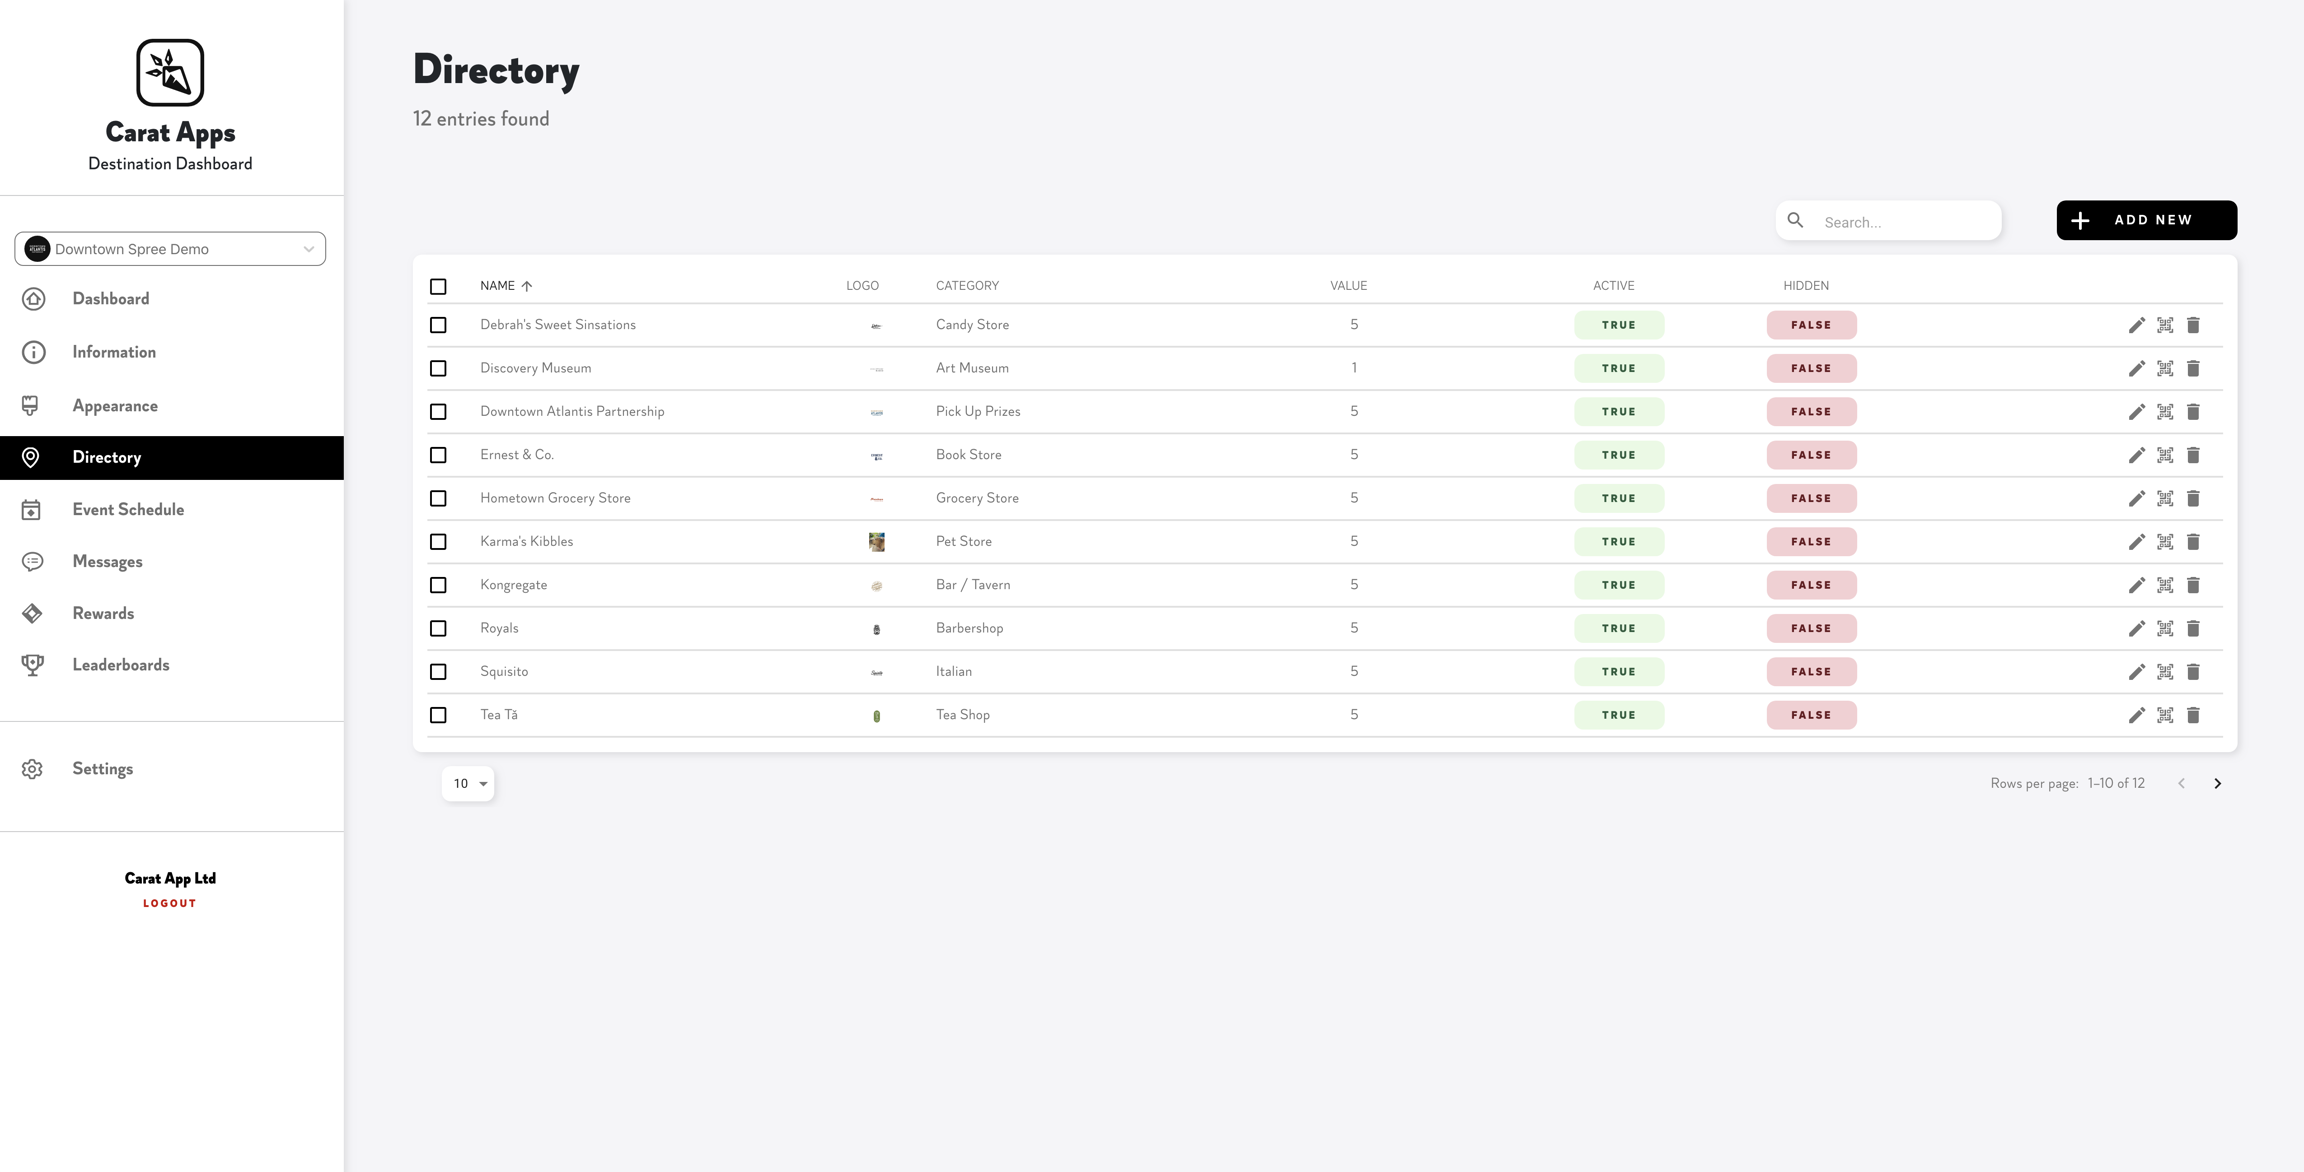
To access this page, click Directory from the menu options. From here, you will see a list of all Directory listings (Shops) available within your Carat Event.
If you just opened the Destination Dashboard for the first time, it is likely that the Directory is empty for you. Click the Add New button in the top right corner to get started.
Adding a New Directory Listing
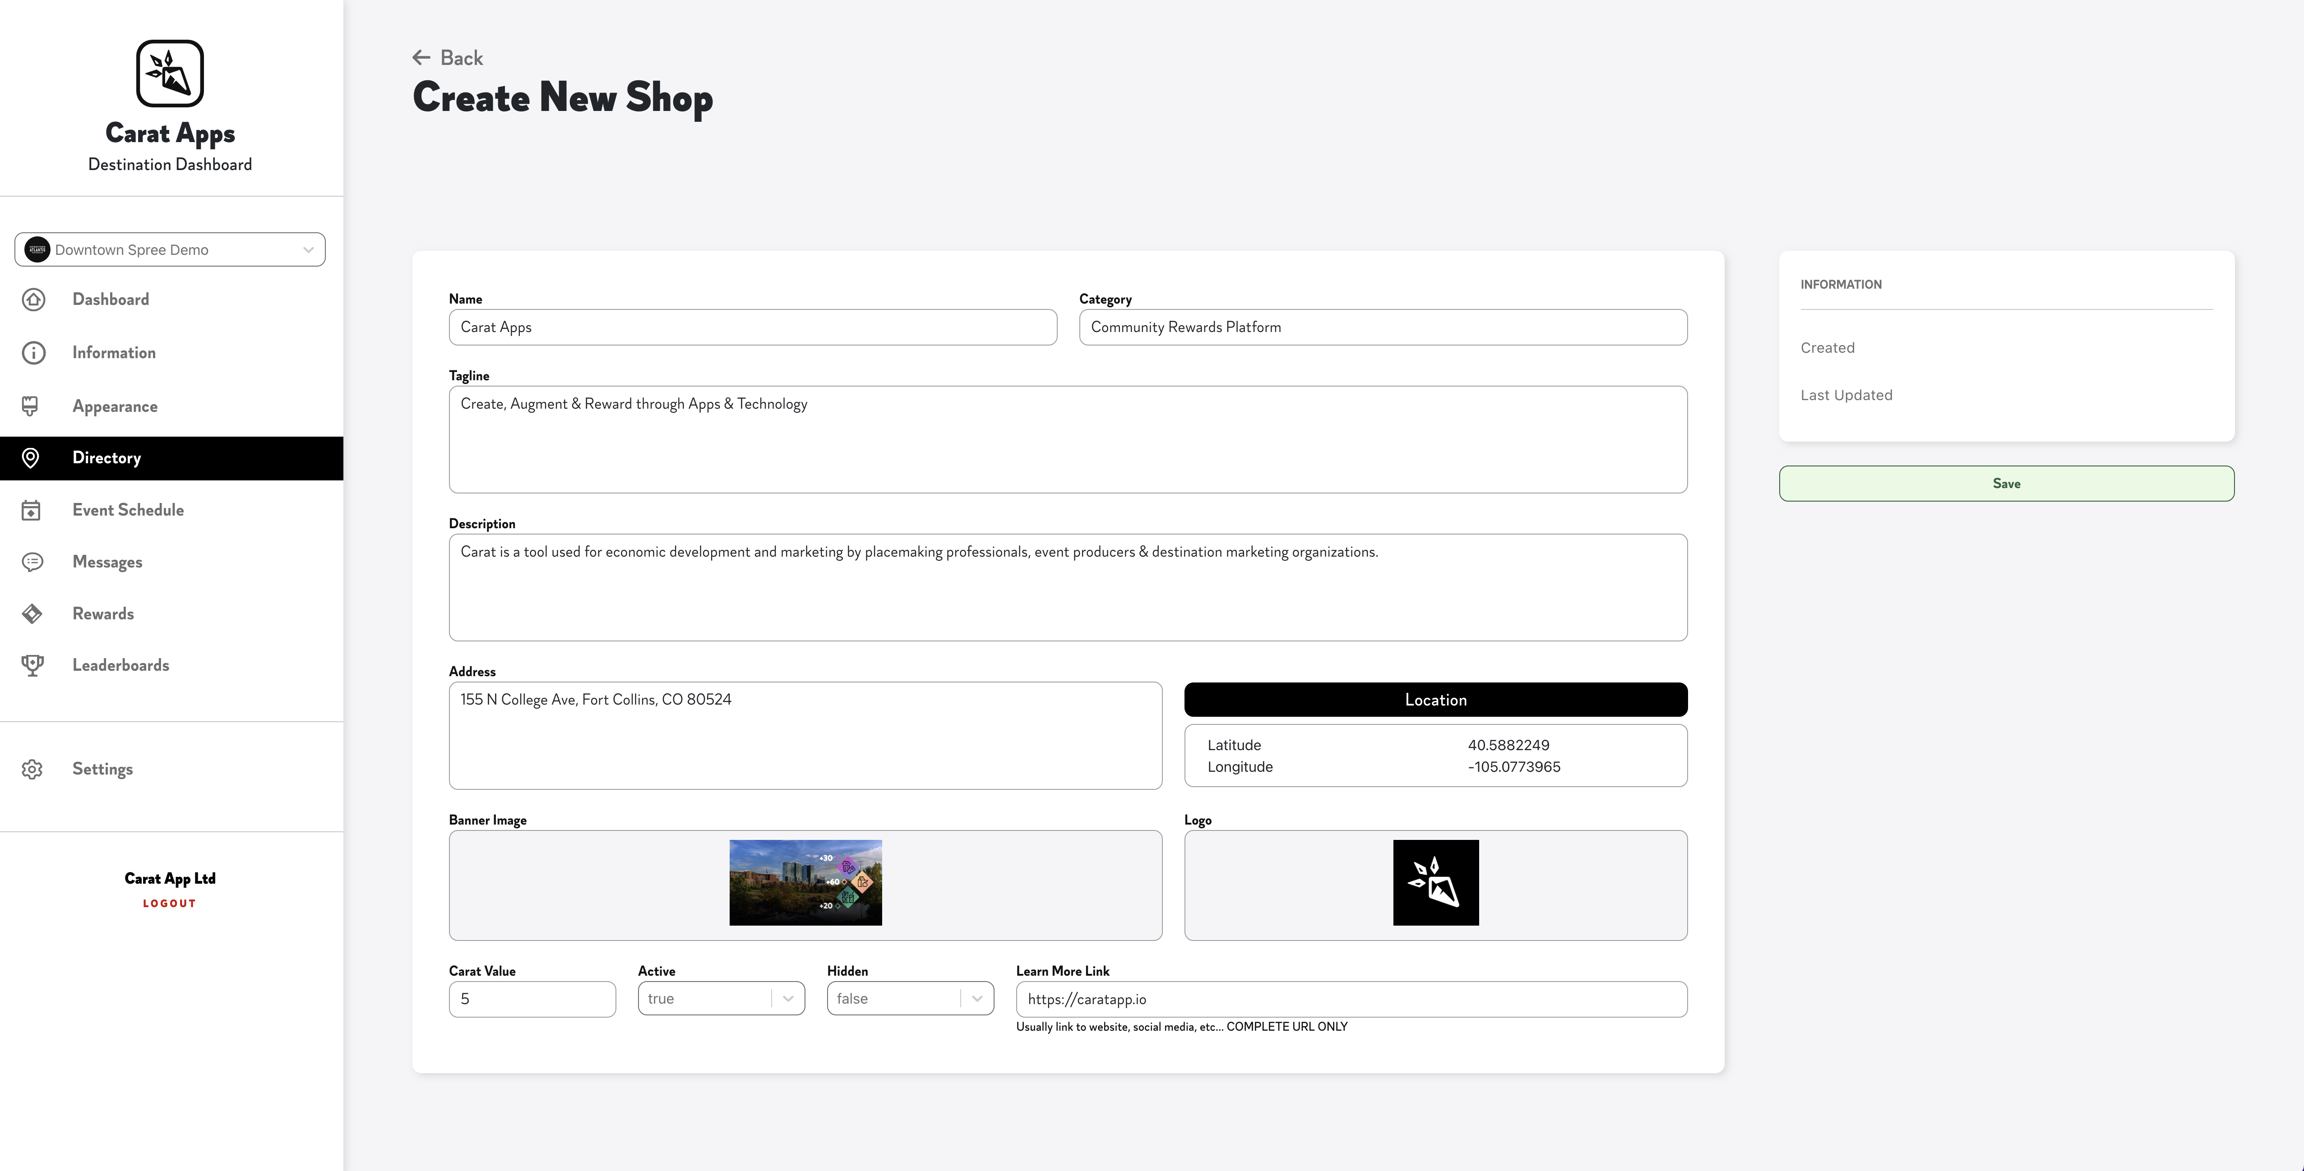
Directory Listing Options
Name of Destination / Directory Listing
Category
Typically used to signal industry, sponsorship levels, or specific attractions. New categories create additional tages within your Carat Event for users to filter by.
Tagline
Typically used for marketing taglines or in the case of conferences / community events, to designate more information about sponsors, speakers or programming.
Description
Typically used for business descriptions or in the case of conferences / community events, to designate more detail about sponsors, speakers or programming.
Address
Typically a physical address, but can be used as an additional custom text field.
Location
If using the mapping feature, click the Location button and search by address to establish the exact location of a destination. If you are not using mapping, disregard this field entirely. Once entered, click Save to lock in the map location for your listing.
Banner Image
Located at the top of a listing, we recommend photos and graphics without text for banner images. Different screen sizes will cause text to be cutoff in some instances.
Recommended Image Size: 800px Width x 350px Height, JPG or PNG format
Logo Image
Located at the center of a listing, above the name. Square images with at least 25px of padding on each side is recommended to avoid any of the logo being cutoff.
Recommended Image Size: 600px Width x 600px Height, JPG format
Carat Value
Adjusts the number of Carats earned by scanning the unique QR code at this location. For community events and conferences, we recommend creating additional rewards for presenting sponsors in order to incentivize additional visits to large supporters.
Active
For shops that you don't want to be available within the app, but you want to maintain the listing in the Dashboard, change Active to False. This setting can be adjusted anytime by Editing the Shop.
Hidden
A hidden shop can be checked-in at, but is not visible within the Explore tab. This is a great feature for Scavenger hunts, Bonus Carats & Extra Rewards for completing additional actions (i.e. making a purchase at a location).
Learn More
A custom link that allows you to create a Call to Action associated with the Directory Listing. This is a great way to encourage users to visit sponsor websites or local businesses.
Once your listing is complete, click the Save button to add your new listing. You can view your directory on the app at any time through the Explore tab:


Downloading your New Shop's QR Check-In Code
Now that you've confirmed your listing is ready, go back to the Destination Directory. Clicking the QR Code Icon next to your newly created Shop will pull up this screen:
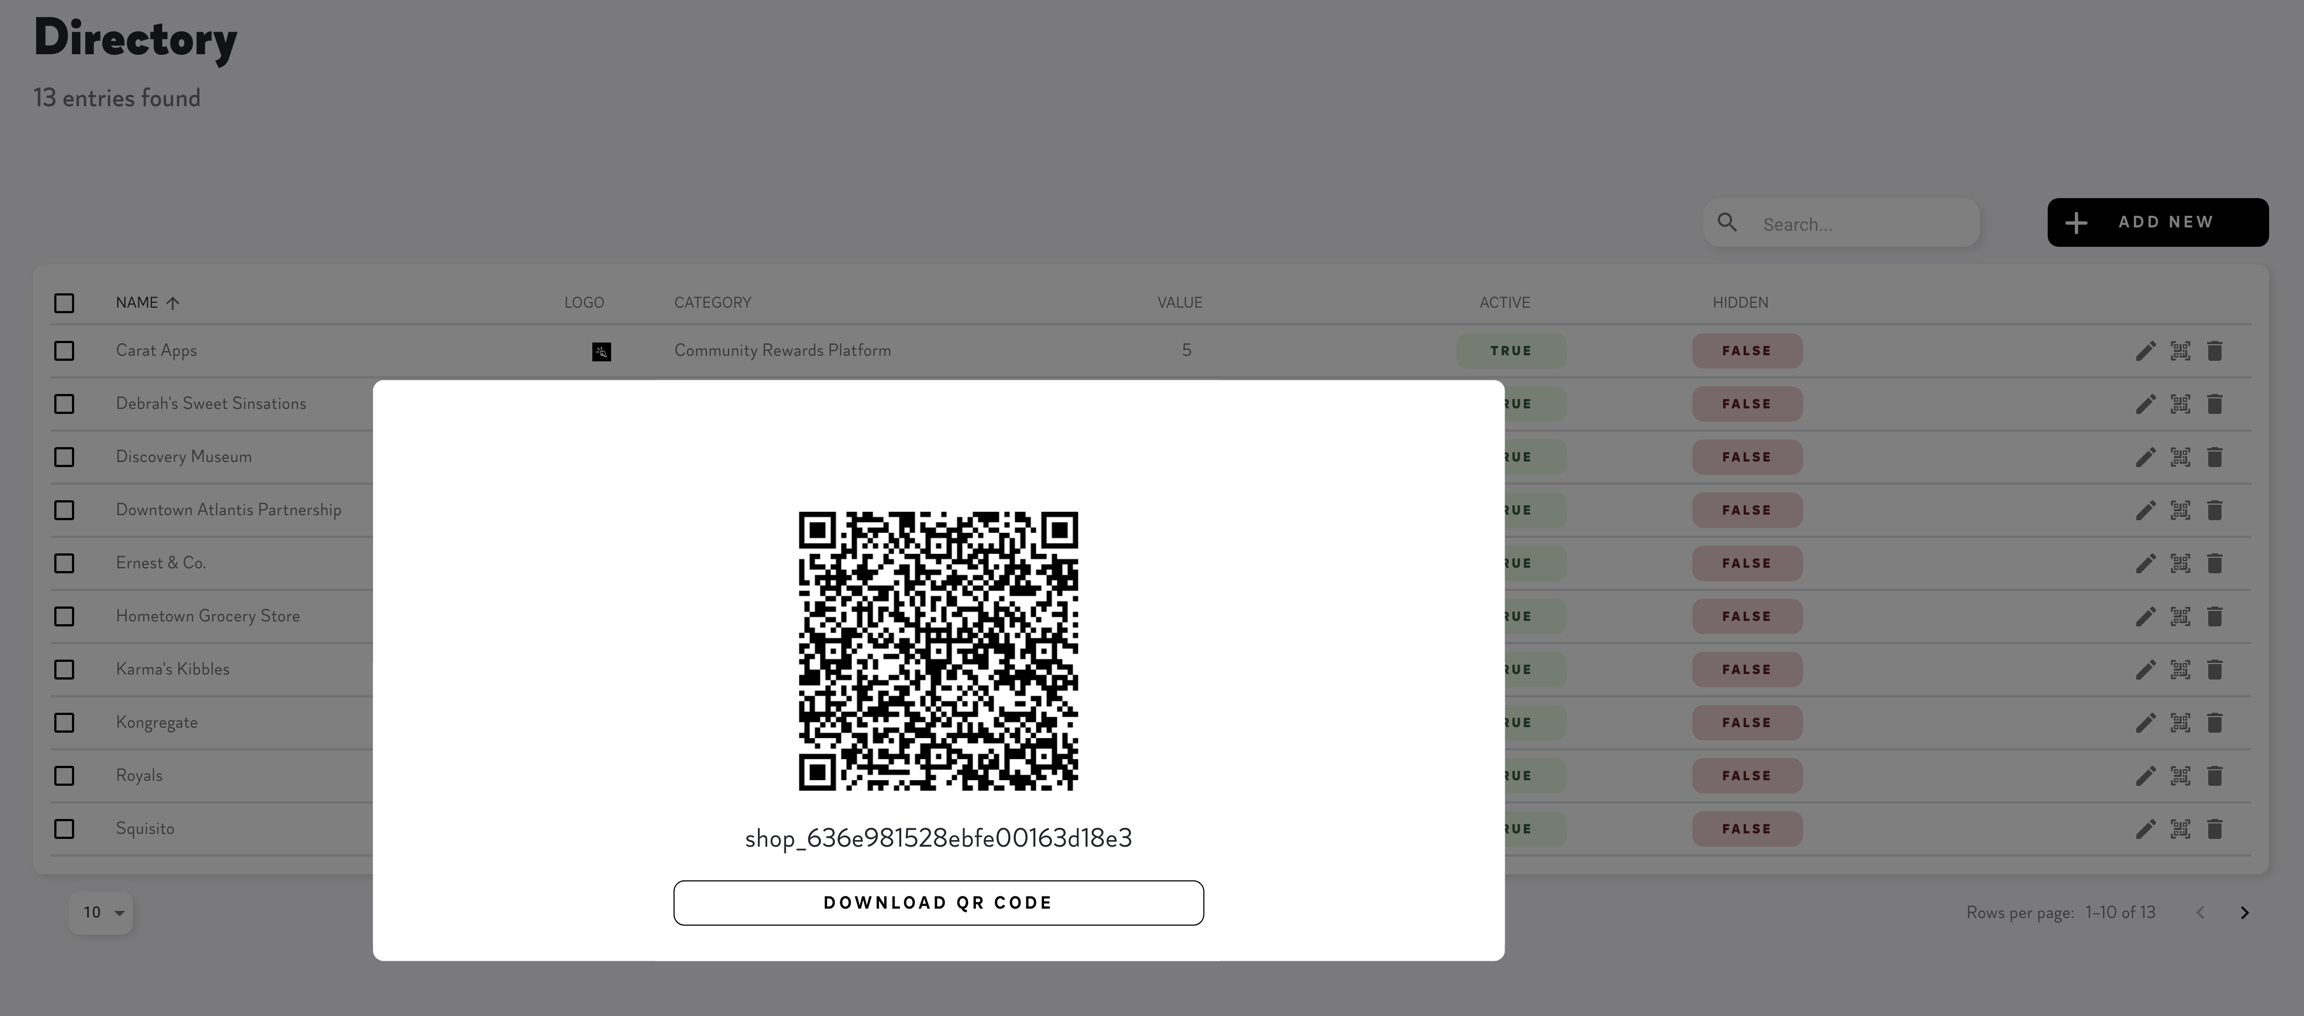
Download the QR Code and add it to your signage, conference badges, or presentations so people can check-in at this location. Visit our Marketing Tools Guide for signage templates and other best practices for administering your Carat Event.
Remember: This Unique QR Code is exclusive to this Shop Listing and never changes unless it is deleted. If you have a recurring event where users can earn Carats by visiting the same place each time, it is important to make sure this code is only available during the event. If you have additional questions, contact support at [email protected].
Managing your Directory Listings
On each Directory Listing, the three icons from left to right are Edit, QR Code & Delete.
Edit Shop
This allows you to make changes at any time to existing Listings. The app must be closed and re-opened to see changes in real-time.
Delete Shop
This can not be reversed without contacting support, so please make sure you are certain you want to delete a directory listing before clicking this icon!
Currently, bulk control options only allow for deletion of multiple listings.
Filter Options
From the Directory, Shops can be filtered by Name (A-Z), Category (A-Z), Value (Carats Earned from Check-In), Active (True / False) & Hidden (True / False).
Have any other questions or need additional support? Contact us at [email protected].
Last updated